

Description
Español:
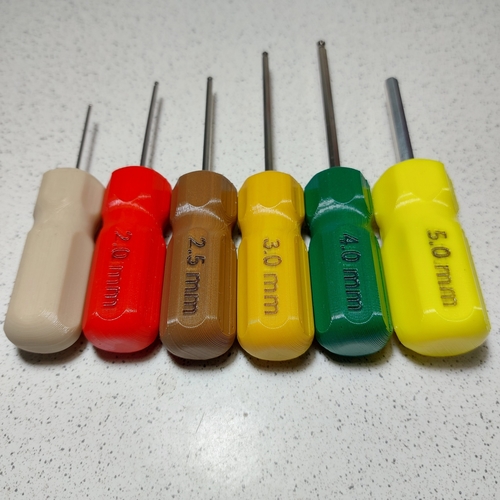
Hola a todos. Les traigo un adaptador permanente para insertar las llaves allen y convertirlas en desarmadores. (Por ahora, solo tengo listos y probados los mangos para las llaves 1.5mm, 2.0mm, 2.5mm, 3mm, 4mm y 5mm, pronto tendré todas).
Pasos:
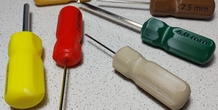
1. Para insertar permanentemente las llaves allen en los mangos, se necesita cortar la pata corta de la llave a una distancia de 10mm tal como se indica en la foto adjunta.
2. Dependiendo de la altura de capa elegida (yo sugiero 0.2mm) en el programa laminador calcule el momento exacto donde se puede pausar la impresión para poder insertar la llave allen.
3. Inserte la llave allen y adhiérala con unas gotas de pegamento de cianoacrilato. Espere unos segundos y cuando la llave quede firmemente adherida, reanude la impresión y espere a que termine la impresión.
4. En bajo relieve se encuentra el tipo de llave (1.5mm ... etc.). Puede usar un plumón indeleble de punta fina para dibujar el numero y sea más legible.
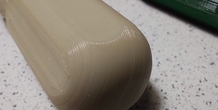
5. Si desea darle un mejor acabado, puede darle una capa de laca o barniz transparente.
Disfrute de su nueva herramienta! :D
English:
Hello everyone. I bring you a permanent adapter to insert allen keys and turn them into screwdrivers. (For now, I only have the handles ready and tested for the 1.5mm, 2.0mm, 2.5mm, 3mm, 4mm and 5mm wrenches, soon I will have them all).
Steps:
1. To permanently insert allen keys into the handles, the short leg of the key needs to be cut to a distance of 10mm as indicated in the attached photo.
2. Depending on the chosen layer height (I suggest 0.2mm) in the laminator program calculate the exact moment where you can pause the print to be able to insert the allen key.
3. Insert the allen key and adhere it with a few drops of cyanoacrylate glue. Wait a few seconds and when the key is firmly attached, resume printing and wait for the print to finish.
4. In low relief is the type of key (1.5mm ... etc.). You can use a fine point indelible marker to draw the number and make it more legible.
5. If you want to give it a better finish, you can give it a coat of lacquer or clear varnish.
Enjoy your new tool! :D
------------------------------------------------------------------------------------------------------------------------------------------------------
Español:
- Se puede imprimir en cualquier filamento duro (PLA, PLA+, PETG, ABS, NYLON, ASA). -Altura de capa de 0.2mm -Boquilla de entre 0.3mm y 0.4mm. -En el programa hay que ver en que momento se debe de añadir una pausa para poder insertar la llave allen y luego continuar la impresion. -No se necesitan soportes. -Relleno minimo 95% para asegurar una buena resistencia.
English:
- It can be printed on any hard filament (PLA, PLA+, PETG, ABS, NYLON, ASA). -0.2mm layer height -Nozzle between 0.3mm and 0.4mm. -In the program you have to see at what moment you should add a pause to be able to insert the allen key and then continue printing. -No supports needed. -Minimum 95% filling to ensure good resistance.
More from this category
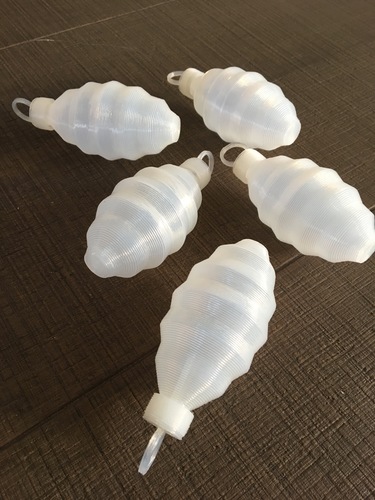
Christmas decoration pine cone
printer settings: simplify use the single outline corkscrew option for the Christmas decoration ...
Star Wars Tie Fighter
Comment Below!! Let me know what you guys would like me to Create for you!! Reversible Tie Fight...
Avatar coasters
by Noceur
A set of coasters inspired by one of my favorite animated shows.

Al Barsha (0528648070) Dubai Call Girls
Al Barsha (0528648070) Dubai Call GirlsCall/Whatsapp:- O5O2483OO6 Dubai Call Girls, Call Girls in...
Comments (0)
Sign in to leave a comment.
No comments yet. Be the first to comment!