
Description
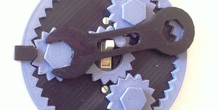
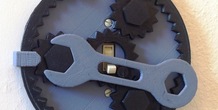
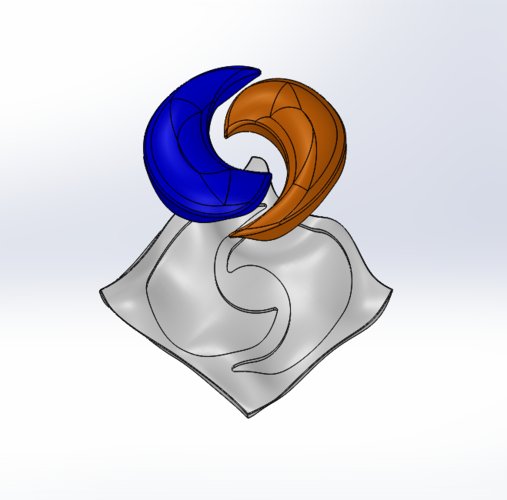
This 3D printed planetary gear light switch cover is a functional decorative item that any gearhead would love. Great for keeping at the entrance to a workshop, man-cave, or garage. Video Demo: https://youtu.be/52C0UFKODkg
The assembled device measures 6.25" in diameter. The largest printed part is 5.875" diameter)
Print Instructions:
The wrench file will need print supports. Print all parts minimum 3 perimeters all sides top & bottom, with 15% infill. I recommend 0.3mm layers maximum. Any material will work as long as you can print without warped parts.
Assembly Instructions: (Read in full before starting)
1. Clean up the gear teeth so they will mesh smoothly then place them on the plate in the rotational same orientation they were when you printed them. (The pin on the sun gear is to the right and the handle of the ring gear is top and center.)
2. Pin the planet gears in place by jamming the nuts into the holes.
3. Apply a smidge of clear drying glue (glue stick works well) to the business end of the wrench then install it from the side and snaps on the nut. The glue is to keep the wrench attached to the nut.
4. Soften the clips using a hard dryer, heat gun (what I use), or even by soaking in hot water. Then align the bump on the clip with the hole on the back of the plate and press over the ring gear. (The holes on the back of the plate may need cleaned up with a knife to aid this, depending on how good your printer is). Then squeeze the clip as it cools. This will ensure that everything is securely held together .
Assembled Version also for sale here: https://engineerdog.com/store/...
Awesome Technical Article on 3D Printing Gears here: https://engineerdog.com/2017/0...
More from this category
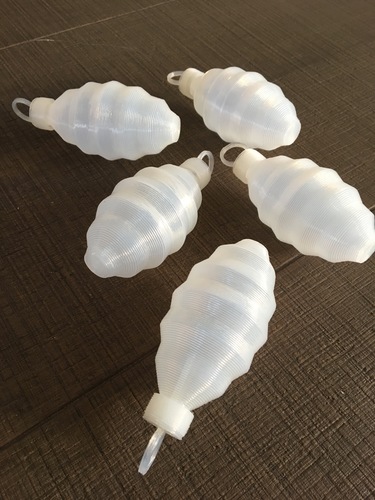
Christmas decoration pine cone
printer settings: simplify use the single outline corkscrew option for the Christmas decoration ...
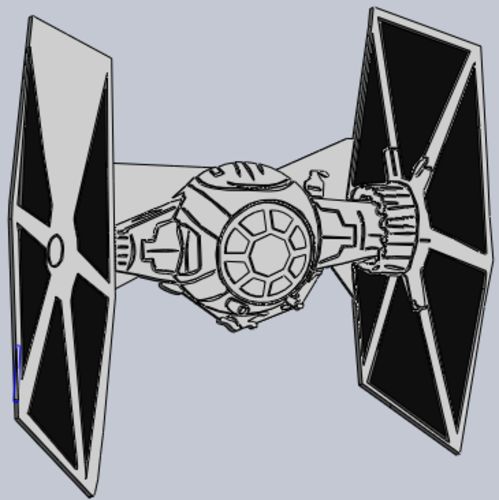
Star Wars Tie Fighter
Comment Below!! Let me know what you guys would like me to Create for you!! Reversible Tie Fight...
Avatar coasters
by Noceur
A set of coasters inspired by one of my favorite animated shows.

Al Barsha (0528648070) Dubai Call Girls
Al Barsha (0528648070) Dubai Call GirlsCall/Whatsapp:- O5O2483OO6 Dubai Call Girls, Call Girls in...
Comments (4)
Sign in to leave a comment.
Để tính toán lợi nhuận tiềm năng, bạn cần trừ số tiền cược ban đầu khỏi số tiền thưởng. Lợi nhuận này có thể được tính bằng cách trừ số tiền cược ban đầu khỏi tổng số tiền bạn nhận được.
Chi tiết:https://789j.one/cach-tinh-tien-ca-do-bong-da/
Love this design. I'm printing it and assembling it right now. I got a little impatient with the heating the clips so I'm printing some more for the ones I broke.
Thanks! On the other end of the spectrum of impatience, watch out for overheating the clips because they can easily get sticky and difficult to handle.