Description
Summary
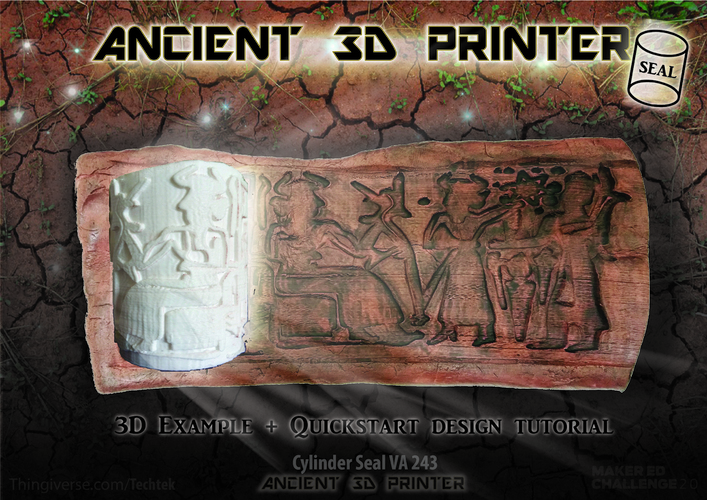
Ancient "3d printing" Technique (Cylinder Seal VA-243)
This ancient analog Sumerian "3d printing" seal can be used to quickly print & share information into mud, wet sand and clay!
You can use the steps in this tutorial to make a seal with your own design for example logo/message/cartoon etc. or make a replica of one of the ancient Sumerian seals.
Don't forget to share it here on Thingiverse!
The steps in the tutorial can also be used for converting 2d pictures, illustrations, patterns, etc. into 3d printable bracelets, lithophanes and other round shaped things
The oldest found seals are around 3500 B.C. engraved with written characters or figurative scenes or both, used in the ancient times to roll an impression onto a surface, generally wet clay.
The seal I used in this tutorial is named: VA 243 (Its named that way because it is number 243 in the collection of the Vorderasiatische Museum in Berlin)
What can be learned from this model?:
Ancient visual way of teaching and storytelling
Ancient technology for quick spreading of information
How to use these seals
Simple way of analogue "3d printing/stamping"
Ancient 3d printing technique
What can be learned from this Tutorial?:
Tracing 2d image
Converting 2d into 3d object
Bending/rolling 3d models
variety of free (3d) software
Make your creations printable
Controversial knowledge:
The Sumerians had advanced astronomical knowledge of the planetary bodies in our solar system
The seal is showing Niburu / Planet X
Readers of Zecharia Sitchin’s books, particularly The 12th Planet, will recognize the above seal, VA 243. This seal is the centerpiece of Sitchin’s theory that the Sumerians had advanced astronomical knowledge of the planetary bodies in our solar system.
This knowledge was allegedly given to the Sumerians by extraterrestrials, whom Sitchin identifies as the Anunnaki gods of Sumero-Mesopotamian mythology. In the upper left-hand corner of the seal, Sitchin argues, one sees the sun surrounded by eleven globes. Since ancient peoples (including the Sumerians according to Sitchin) held the sun and moon to be “planets,” these eleven globes plus the sun add up to twelve planets. Of course, since we now know of nine planets plus our sun and moon, part of Sitchin’s argument is that the Sumerians knew of an extra planet beyond Pluto. This extra planet is considered by Sitchin to be Nibiru, an astronomical body mentioned in Mesopotamian texts. Sitchin’s works detail his contention that Nibiru passes through our solar system every 3600 years, and so some believers in Sitchin’s theory contend that Nibiru will return soon. Some followers of Sitchin’s ideas also refer to Nibiru as “Planet X”.
Is Sitchin correct – in whole or in part?
Continue reading why some say he is wrong:
http://www.sitchiniswrong.com/VA243seal.pdf
If we leave the right or wrong about the planets in the middle, this piece is still a fascinating piece of history and the print speed of this technique is amazing! ;)
Start printing like a ancient Sumerian today!
Print Settings
Printer Brand:
Printrbot Printer:
Simple Black Supports:
No
How I Designed This
Tutorial
Design Steps:
Find a picture of the Sumerian seal (or logo/message/cartoon etc.) you want to trace.
Use google image search and search for: "Sumerian Seal"
(1.1 Optional: To make things more easy but less good final result, Click on "search tool" button and click color > "white" and find a nice line drawing of your subject of choice.)
Import your picture and Digital trace the outlines of top view of your picture of the seal (or logo/message/cartoon etc.) using Adobe Illustrator and the pen tool.
-Export as .SVG file.
(GIMP +SVG plugin is a free alternative option)
(Or if you choose option 1.1 in the first step you can skip the time consuming pen tracing and instead selected "Image trace" and play with the threshold slider to find the best result)
Import the SVG into Sketchup close al faces and extrude faces
Keep in mind:
The overhang/support material
3d Printer capability's
Only the parts you want to press into the clay need to be extruded.
Export OBJ/STL
Import in Blender and roll the model
(Youtube Tutorial -> youtube.com/watch?v=b4ADqHZNKrQ )
Export OBJ/STL
Import back into Sketchup and add a cylinder core
-keep in mind the overhang/support material
Import into Meshmixer and make it solid
Select your model and press the edit button > Make solid
(Good alternative option https://makeprintable.com/ )
(Keep in mind, not all of the above steps are mentioned precisely, and you may need to fix some small issues on your own.)
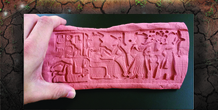
Final result: Sumerian seal VA-243
Searching line drawings using Google image search and search tool option.
Tracing the seal image using Illustrator and the pen tool.
Close faces and extrude using Sketchup
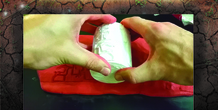
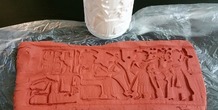
Press and roll the 3d printed cylinder seal into the clay
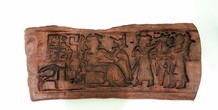
After drying the clay (24hrs)
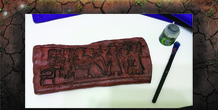
After painting (paint used: Citadel Shade: Nuln Oil)
Custom Section
Project: ANCIENT 3D PRINTER
◦Project Name: ANCIENT 3D PRINTER
Overview & Background:
Ancient visual way of teaching and storytelling
Ancient technology for quick spreading of information
How to use these seals
Simple way of analogue "3d printing"
Ancient "3d printing" technique
Objectives:
Learn about an ancient communication method
Learn about history
Learn about Sumerians
Learn about 3d modeling and printing (if you want to design it by yourself)
Learn how to bend flat 3d models (if you want to design a seal by yourself)
Audiences:
Age 5+ (ancient 3d printing in clay)
Everyone, but for designing the seal by yourself you will need some free tools and patience to master them.
Subjects:
Science, History, (digital)media, Information, technology, mystery, alternative history, knowledge
Skills Learned:
2d tracing
3d modeling
Using your own created 3d tool to transfer your created impression into clay
Lesson/Activity:
Trace 2d image
Make 2d traced image in 3d shape
Bending your 3d shapes
Printing and transferring your design into clay
Duration: around:
4x 2.5 hour (?)
Preparation:
Knowledge: Some experience with 2d/3d software, 3d printing and preparation experience is required.
Material and other hardware: 3d printer, Clay, (optional: Paint & Brush)
Software needed: Illustrator (/GIMP), Sketchup, Meshmixer, Blender
https://www.gimp.org/ (free)
http://www.sketchup.com ("free")
http://www.meshmixer.com/ (free)
https://www.blender.org/ (free)
References:
Wikipedia: Cylinder seal: https://en.wikipedia.org/wiki/Cylinder_seal
Rubric & Assessment: At the end of the tutorial, you should have a seal with your own inscription. and have a clay tablet with your transferred inscription
Handouts & Assets:
Please see the attached pictures
Thank you for reading.
If you found this information and model useful please support and press the like and follow button. And don't forget to check out my other models and tutorials
.
Custom Section
Extra info
(i'm getting a lot of downloads on my models, yet i don't see much people post back there printed results, if you want people continue to provide FREE models, please provide something back in return: Pictures, Comments, Tip money, a Thank you, a Follow or a Like...)
Thanks for watching, If you enjoy this model please support and check out my other models and tutorials:
.
For example:
LASERBEAM
http://www.thingiverse.com/thing:2159251
Ancient "3d printing" Technique (Cylinder Seal VA-243) (Tutorial + Example)
http://www.thingiverse.com/thing:1597817
Megabyte Bust - Reboot (Low-Poly)
http://www.thingiverse.com/thing:2117499
D-WAVE 2X - Quantum Computer
http://www.thingiverse.com/thing:1731287
The Ark of the Covenant - Diorama-KIT
http://www.thingiverse.com/thing:1755163
More from this category

"like" Prohibited
Summary I made this remix version of pedantic's "Like.... Prohibited" sign because I'm pedantic a...
2 ❤️
1 💬
0 ⬇️
Free

Whal Shaver Wall Mount
by tristan Hay
Summary Simple wall mount for a Whal electric beard shaver. Has screw holes but i used mounting ...
1 ❤️
1 💬
0 ⬇️
Free
Trailer Hitch for Traxxas TRX4 Defender D110 Body RC
by Leo1281
Summary Trailer Hitch for Traxxas TRX4 Defender D110 Body RC Print Settings Printer Brand: Deltap...
3 ❤️
1 💬
0 ⬇️
$0.5
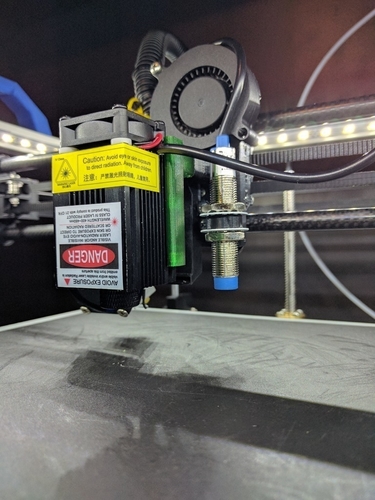
Hypercube E3D Laser Mount
Summary This is a WIP. Once tested fully, ill update the thing accordingly. Purchased the laser f...
2 ❤️
1 💬
0 ⬇️
Free
Palette PTFE Tube Holder MK2S
by malcinator
Summary This thing was made with Tinkercad. Edit it online https://www.tinkercad.com/things/48rs9...
1 ❤️
1 💬
0 ⬇️
Free
Comments (1)
Sign in to leave a comment.
No comments yet. Be the first to comment!