Description
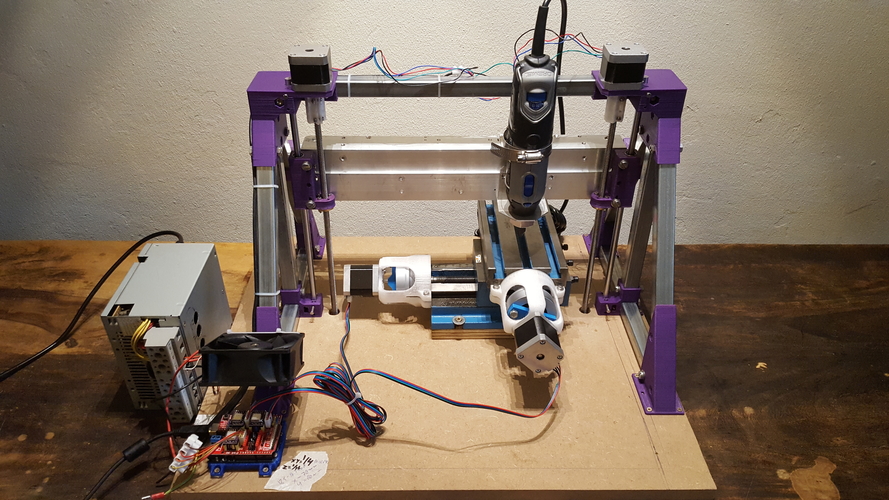
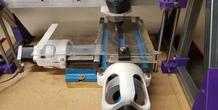
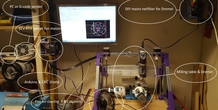
This is a model for making a Z axis for a CNC mini mill.
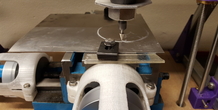
I had a milling table, Dremel, CNC shield and some motors lying around and saw a mini CNC mill in it.
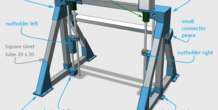
I only needed a Z axis so I made one out of square steel tube (20x20mm). I connected them with 3D printed parts of ABS. It’s purple because I had a lot of that color. The spindles and guiding rod are M8.
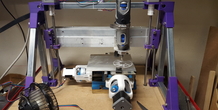
Using model “Nema 17 bracket for milling table” I connected the steppers to the milling table. For these brackets please see:
https://pinshape.com/items/41283-3d-printed-nema-17-bracket-for-milling-table
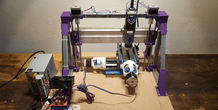
So with these components I made this mini Mill. Because the table can only move 80 by 80 mm it’s not very big. But of course if you would use a bigger table, you can make the X and Y axis bigger.
As a controller I used an Arduino Uno and a CNC shield with DRV8825 drivers and GRLB python script found on the GitHub (https://github.com/grbl/grbl). In this case I just used universal Gcode sender for sending the Gcode (https://github.com/winder/Universal-G-Code-Sender). The Gcode and paths are created using Inkscape (https://inkscape.org/en/)
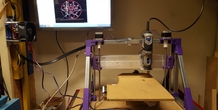
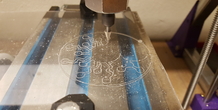
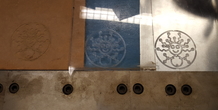
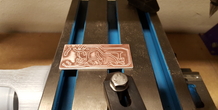
First test was on a MDF plate, but worked not so well because I do not have the right milling bit for the Arduino.
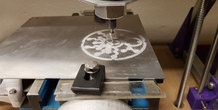
Second test was on an acrylic plate, but the milling bit did more melting than milling :-). I suppose I had to use a cooling liquid.
Third test was on an aluminum plate and that worked better except that my mini Dremel bit flexed a bit during milling.
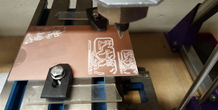
The fourth test was milling a PCB and it worked but I have to improve my Gcode.
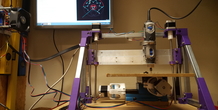
So the mini mill works very well. The motors didn’t skip any steps due to EMF frequencies coming of the Dremel brushed motor. I did use a DIY mains filter for it. If you are interested in this mains filter feel free to ask. As a backup I even had a 1:1 1KVA transformer ready, but I didn’t need it.
I didn’t use end switches because the can cause a lot of EMF issues. Also I didn’t shield anything, so less is more :-)
For micro stepping I had to settle on 4 micro steps for the X and Y motor avoiding.
If you have any questions feel free to ask :-)
More from this category

Pain Train Knuckles
by Eric Darnold
Plastic knuckles that work very well in a pinch.
Smart LCD Case Stand Alone version
A stand alone LCD case for the RepRap Smart LCD with SdCard reader
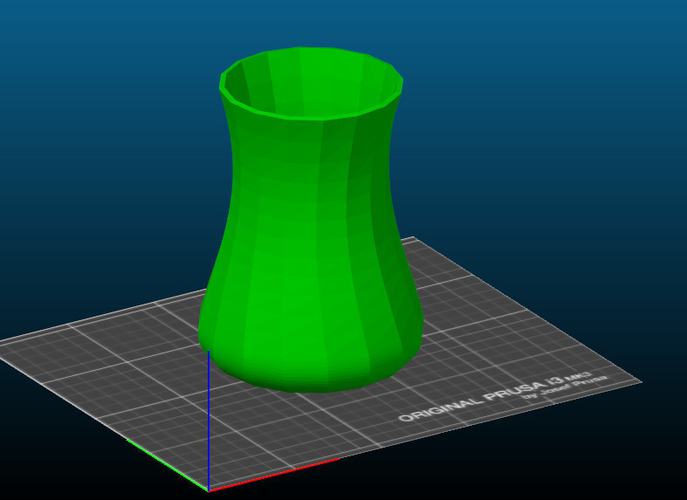
Simple Vase
by ANBR
This is my first design created by studying 3D modeling software. It is very simple, but we ...
Fatshark camera lens cover
by vvdd
SummaryYou will eventually loose the cover..here is a replacement to protect your Fatshark Camera

Lion Floral Iphone Case 6/6s
This beautiful Iphone case surely looks great and is easy to print. The design was inspired by a...
Comments (3)
Sign in to leave a comment.
That sounds like a clever and resourceful build! Using what you already had on hand, especially repurposing square steel tubing and 3D printing the connectors, is a great way to keep costs low while still getting a functional Z axis. And honestly, the purple ABS gives it some personality—practical and stylish! Would love to see it in action.
<a href="https://geometrydash-lite.org/"> geometry dash lite</a>
This blog is a fantastic resource. Appreciate your effort. https://paperwritingservices.reviews