

Description
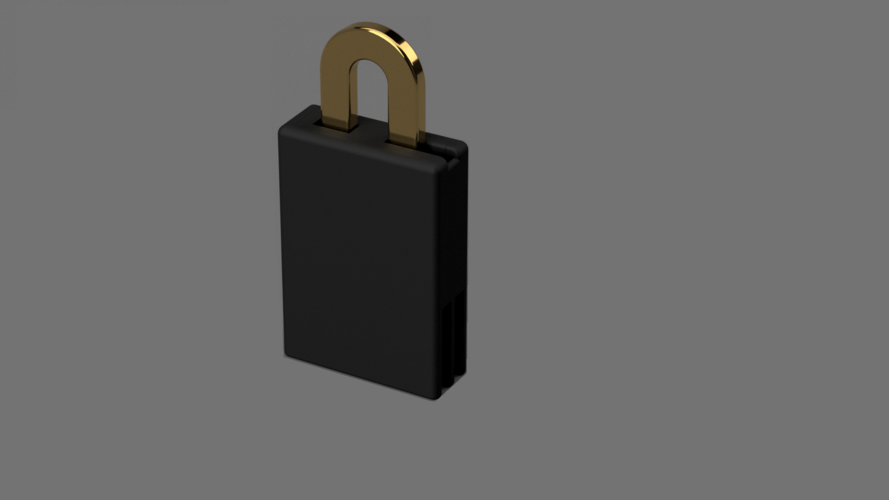
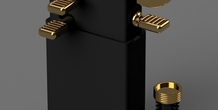
World's first 3D printable 4 key puzzle lock Inspired by a userJinx1385 on Reddit. This intricate puzzle lock features 3 keys a key holder and the lock itself. Challenge your friends family and co-workers to this one of a kind puzzle today.
Besides for a 3D printer and filament, the only other materials required are 16 M3x8mm screws That can be easily obtained here - https://www.amazon.com/uxcell-M3x8mm-Thread-Stainless-Socket/dp/B01M5DWCOW/ref=sr_1_13?s=hi&ie=UTF8&qid=1520890276&sr=1-13&keywords=M3x8mm
Detailed photographic assembly instructions can be found here - https://imgur.com/gallery/4YKJT
For the adventurous type, you can follow the following instructions down below. Good luck! Step 1: Add Pin 1,Pin 2 ,Key block slide,Shackle to Main body. Then fasten Side bolt to main body with 1 M3x8mm Hex Socket Screw Step 2: push Spring A,B and C on to assigned pins Step 3: attach bottom bolt to main body with 1 M3x8mm Hex Socket Screw Step 4: attach sub body two main body with 4 M3x8mm Hex Socket Screw. Step 5: Slide lock assembly into the top cover. fasten to lock assembly with 2 M3x8mm Hex Socket Screw into the holes located on the bottom. Step 6: Slide on the Slide cover onto the Top cover. Step 7: Fasten bottom nut onto bottom bolt till barely hand tight Step 8: Attach bottom nut plate to slide cover with 4 M3x8mm Hex Socket Screw Step 9: Attach bottom cover to slide cover with 4 M3x8mm Hex Socket Screw Step 10: Screw in Bottom bolt cap
Please visit my Patreon to keep up on all my other creations or to show some love and Become a patron. - https://www.patreon.com/DeathRowIndustries
More from PuzzlesMore from this category
Explore Making: VeggieMake
Students are given a VeggieMake (a toy that turns produce into a cute character)– but the pieces ...

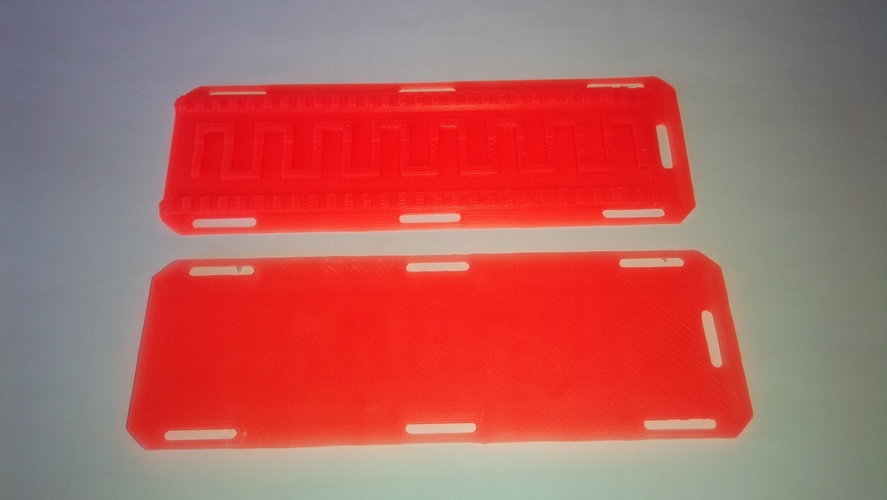
Scale 1/10 car rescue board
by Gekon3D
This is a scale car rescue board for your RC car equipment. Two possible way to print this...
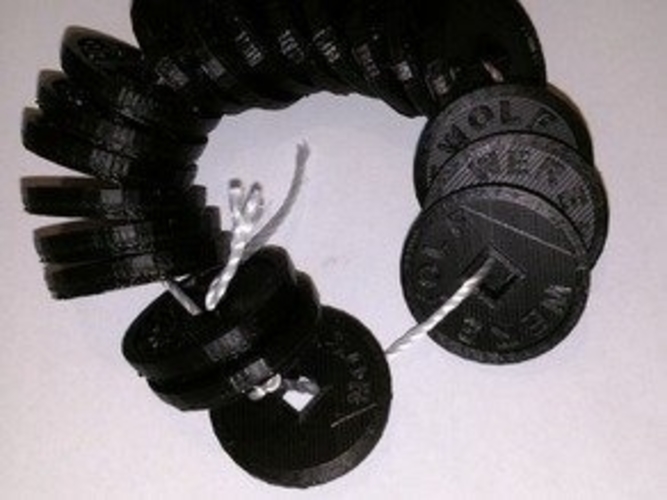
Werewolf Game Tokens
by Pax13
I enjoy a good game of Werewolf (alternate version of Mafia), and wanted to see something a littl...
Comments (2)
Sign in to leave a comment.
I get paid more than 💵$100 to 💵$500 per hour for working online. I heard about this job 3 months ago and after joining this I have earned easily 💵$20k from this without having online working skills . Simply give it a shot on the accompanying site...
Here is I started.…………>> www.earnapp1.com