Description
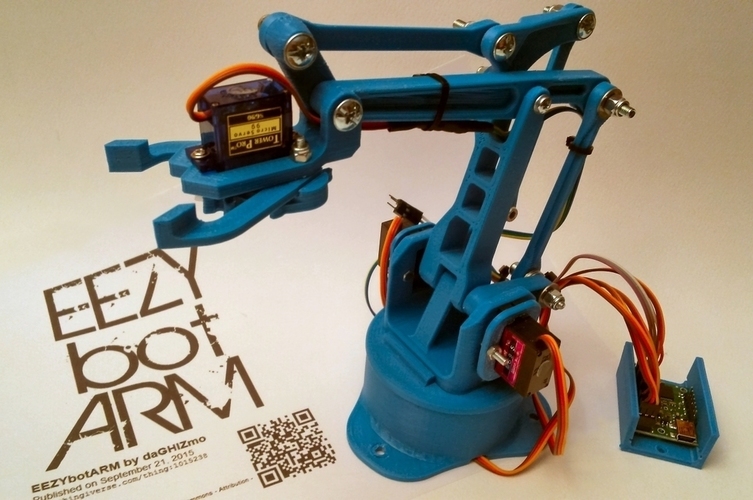
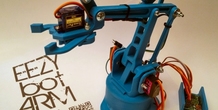
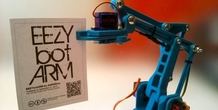
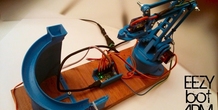
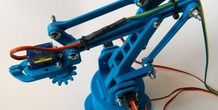
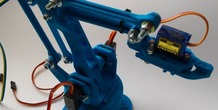
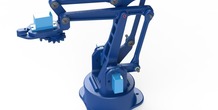
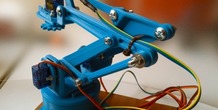
SummaryThis is a 3D printed robotic arm
The intent was to design something "easy" and cheap to built with a good visual impact also.
Test video: https://youtu.be/qovZKW0DxWk
https://youtu.be/N55W8TdMfCo
I spent time to look around the web at some examples available that could be a good starting from, and between all I found interesting the phenoptix MeArm V4 project (http://www.thingiverse.com/thing:360108) especially for the simplicity and low cost of parts involved.
So I kept only the kinematics geometry and redesign all parts including the gripper
23/09/15
updated instruction and round ramp stl (R01), added ball stl
preliminary tests video
https://www.youtube.com/watch?v=x9C_3WHr1G0
https://www.youtube.com/watch?v=0OFL6MxbPIM
25/09/15
updated gripper r01 files
04/10/15
added instructables link in instructionInstructionsI made an Instructables here : http://www.instructables.com/id/EEZYbotARM/
In all joint I use M4 screws with round head
For the vertical arm I prefer to guarantee a better precision using two brass pipes. the lower one stay in position kept by the servos, the upper one is crossed by a M3 screw (I'll post a better explaining image)
First tests has been made with cheap servo sg90
http://www.servodatabase.com/servo/towerpro/sg90
than I changed the more stressed with metal gear servos MG90
http://www.servodatabase.com/servo/towerpro/mg90s
only for the claw I left the plastic one (but this can be of your choice)
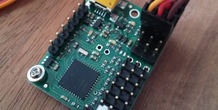
For driving the bot I made a lot of experiment using all the available method with arduino : sketches, potentiometers, joystick, WII nunchuck …. but at the end I discover a nice controller from Pololu that solves all the problem related to the servo driving in the easiest way. You can attach up to 6 – 12 – 24 servos depend of the controller type and it is provided with a software that give you the power to drive the servo in manual moving slides in the mean time you are able to set the values of speed and acceleration for any singular item. You can also build sequences of commands in a easy way, store them in the controller o get the code automatically. GREAT !
here the link of the Pololu servo controller
https://www.pololu.com/product/1352
Recent Prints (2)
More from this category

Pain Train Knuckles
by Eric Darnold
Plastic knuckles that work very well in a pinch.
10 ❤️
2 💬
0 ⬇️
$1.0
Simple Vase
by ANBR
This is my first design created by studying 3D modeling software. It is very simple, but we ...
3 ❤️
1 💬
0 ⬇️
Free
Fatshark camera lens cover
by vvdd
SummaryYou will eventually loose the cover..here is a replacement to protect your Fatshark Camera
0 ❤️
1 💬
0 ⬇️
Free

Lion Floral Iphone Case 6/6s
This beautiful Iphone case surely looks great and is easy to print. The design was inspired by a...
2 ❤️
1 💬
0 ⬇️
$2.0

Comments (5)
Sign in to leave a comment.
<a href="https://dailypickuplines.com/">Best Platform For Pick Up Lines</a>:
Forums and online communities centered around common interests provide unique opportunities for pick-up lines. Whether it's a shared hobby or passion, these platforms allow for creative and contextually relevant approaches.
Hello, We are providing all Social Media Marketing Services.
Buy Social Media Services- https://www.cheapbulkaccounts.com/product/buy-twitter-accounts/
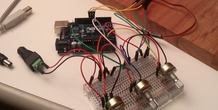
Just finished print this design and assembled it with almost perfect fit everywhere, except for the servo arm housing for the vertical arm needed a little bit cut out to make it fit nicely. This servo was a little too tight so I printed another servo mount (increased in size by 1% as it was a bit tight too) to fit between the frame and the servo. Set up with 3mm bolts to try it all out and I plan now to disassemble and reassemble with M4 bolts and to thread the bigger pieces to suit. This should give a very steady unit. Picture will come later when I have finished. Just need to work on controlling electronics - Arduino at this stage. I have already designed a shield to drive up to 6 servos. with it's own power supply socket and a feed to power the Arduino too. Great job on the design, well done! 2 months later- Due to burning out too many micro servos I have now made a combination of mk1 and mk 2 to use the bigger servos on the main arms. Will add files for this alteration later. Also have designed a pc board to run the ATmega328 micro directly using blue tooth control. ie not a shield and not a Uno. Have had trouble getting smooth operation due to spikes on the system from the servos.
And superb achievement