
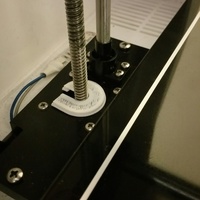


SummaryI added the Lead Screw upgrade to my Robo3D R1 and then found I had this hole exposing the screw connected to the motor. I was afraid little pieces of plastic can fly in there and damage something.
I wanted a solution but I didn't want to take everything apart to implement in.
So I came up with this quick printing hole cover (3 min max) that is easy to slide on the screw without messing with the thread. InstructionsPrint Info
Make sure you print with the hole facing down
PLA
.3mm Layer Height
No Support
20% Infill (keeps it flexible but strong)
(recommend you scale up 1% to make sure printing excess doesn't mess with threads on lead screw)
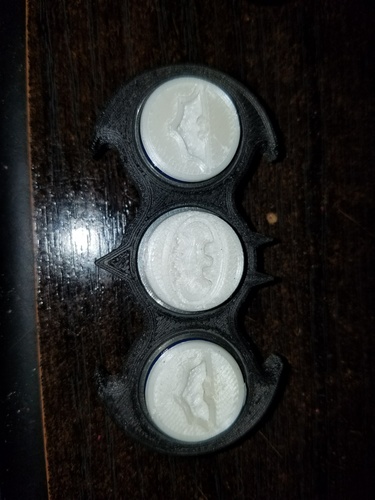
I purposely made a small thin first layer and then bridged the second layer to cause that mesh look but also for flexibility. I found when I had a full first layer it would be too stiff to print with PLA.
Loading prints...
Robo3D Lead Screw Upgrade - Quick Printing Hole Cover
0
likes
0
collections
Tags:
Creative Commons Attribution-ShareAlike
You can distribute, remix, adapt, and build upon the material in any medium or format, as long as attribution is given and your contributions are under the same license.
 Licensed under CC BY-SA
Files Included
1 downloadable file:
Free download - login required
Downloaded: 39 times
Downloaded: 39 times


Loading comments...