


Description
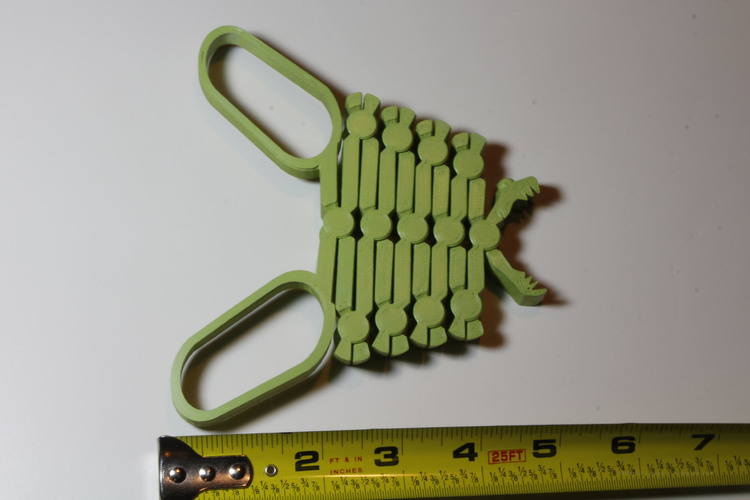
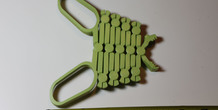
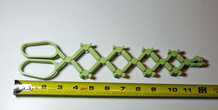
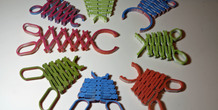
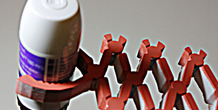
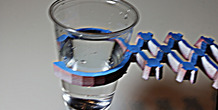
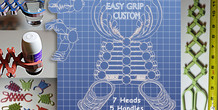
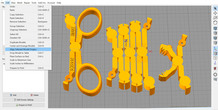
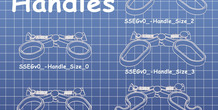
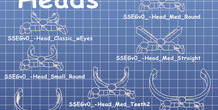
Enables people with limited use of their hands to manipulate small objects at a distance in a fun and effective way. Includes 7 head shapes and 5 handles in different sizes you can combine in any combination to suit your needs. Tailor the handle to fit the user, and the head to fit the task, so the tool functions as an adaptor extending the range of tasks performable by disabled users. Instantly increases physical reach by up to 12". One tester said it gave him "a super-power to reach things." If you need a different size or shape end, just ask and I'll be glad to add it to the collection.
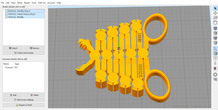
Prints without support and comes off the build plate ready to use.
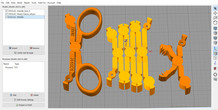
How to Customize Import one head design and one handle design, along with the middle ['SSEGv0_-Middle.stl'] into your slicer. Depending on your software and settings, you may need to align the parts to form a complete scissor snake. Don't worry, that's easy... in Simplify3D, select all three models and choose 'Edit|Align Selected Model Origins'. You'll see the see the part register properly. In Makerware and Slicr, the models should come in already aligned. If you repostion them, just make sure all three models are selected first so they move together.
How to print the Scissor Snake Prints easily on most printers. Be sure to use a clean and level build plate. Print at 0.2 mm layer height and 30% infill or greater, with 3 or 4 perimeters for strength. You can tighten up the action by scaling down the parts by 5% to 10%. If your print is too tight, or fuses, you can increase the clearance by increasing the scale by 5% to 10%. Video instructions are in production now. YouTube Video
Recent Prints (0)
More from this category
Smart LCD Case Stand Alone version
A stand alone LCD case for the RepRap Smart LCD with SdCard reader
Simple Vase
by ANBR
This is my first design created by studying 3D modeling software. It is very simple, but we ...
Lion Floral Iphone Case 6/6s
This beautiful Iphone case surely looks great and is easy to print. The design was inspired by a...
Daedalus NL330 CNC Dust Shoe 100mm to 80mm spindle spacer
by CollectorCNC
Makes the all of the Daedalus NL330 CNC Dust Shoes available on Amazon fit 80mm CNC Spi...

Apple Pencil with Smart Cover clips for iPad Pro
by vova_chmarak
Clips for iPad Pro with Smart Cover and apple pencil
Comments (5)
Sign in to leave a comment.
Cool - can I print extra pieces to add-in? I'd like a version that can reach several feet.
Hi -- I think you've been the victim of autocorrect above -- you have "parameters" rather than "perimeters".
THANKS, gets me all the time since my eyes went.
Here's a video user John Biehler made showing the Scissor Snake: https://youtu.be/V7sn7SRo9TU Thanks John!