


The turntable is not intended to compete with a good deck. I see it as a development design for further experimentation - but it does work well given its limitations.
This is not a complete and full construction guide. I’ll try to publish one on Instructables when I’ve completed testing the deck and finished some mods - there are improvements to come.
For builders it would be useful to have some knowledge of turntables and their associated geometry - there are many guides on the web. Also check out turntable protractors for setting up tonearm position. The turntable follows accepted geometry with a few of my own exceptions.
You will also need to wire the motor and tonearm, fit a switch and small 12v power socket. I’ve reserved a small boxed area next to the motor block for this purpose.
To complete the construction you will need:
Various 3 and 4mm bolts and nuts of various lengths.
Five 8mm x25mm hex head bolts.
Two 22mm dia., 8mm 608ZZ radial bearings - typically used on 3D printers, for the platter spindle.
Two 4mm ball bearings.
500mm of 8mm Carbon Fibre Tube with 6mm inside diameter. I purchased from: http://www.ebay.co.uk/itm/1123... They have a very efficient service and a wide range of CF Tubes.
I used rubber grommets on the base of the feet and on the record platter supports.
A rubber belt from: http://www.gbaudio.co.uk/data/... I got the 217mm x 5mm - BELT45.
Some tonearm wire: http://www.ebay.co.uk/itm/TONE...
A cartridge of your choice. I used a Shure that is 25 years old and a new stylus - my record collection is precious :-)
Two chassis-mount phono outputs.
A 1.5amp 12V power supply. You might have one as they are very common.
Time and patience.
1. Print all parts. PLA @ 25% - 30% infill for most parts except for the tonearm section for which I used a Carbon Filament at a 40% Infill. This was printed on a Wanhao i3.
2. Assemble the Platter Block with its Struts and Front and Rear Legs.
3. Assemble the Motor Block. The Motor is from eBay: http://www.ebay.co.uk/itm/Mounting-Holes-25MM-DC9-12V-Turntables-Motor-33-45-78RPM-For-3-speed-Turntable-/152327593154?hash=item23776e9cc2:g:BmQAAOSwiONYNBWj
4. Fit the Motor Block into the Struts.
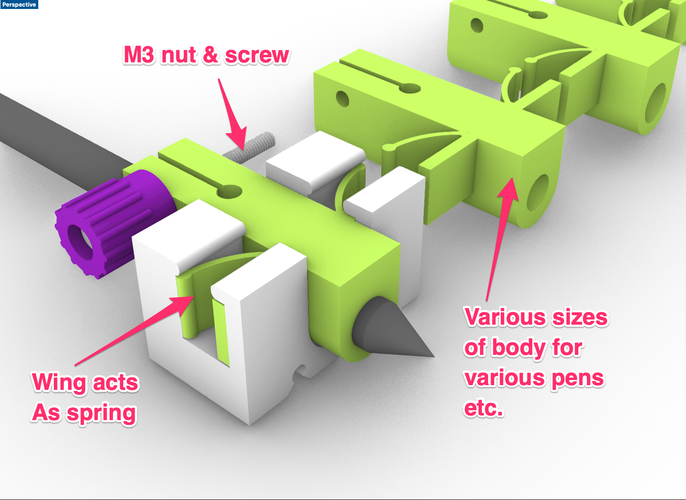
5. Assemble the Tonearm Block.
6. Assemble the Platter and fit the top record centre.
7. Assemble the Tonearm which is a single-top balance-point style. Follow the photo guide for lengths of carbon fibre tube.
8. Slide the assembled wire into the carbon tube until it comes out of the tonearm swivel and then fit the headshell. Align the headshell with the swivel.
9. Place the assembled arm onto the spindle and centre the bearing - you should be able to feel it locate. Fit the Platter.
10. Assemble the weight and slide onto the rear carbon fibre wand.
11. Solder the correct ends of the tonearm wire to the phono outputs.
12. Fit the belt.
Test: You will need to level the turntable. I fitted grommets onto the base of the feet to reduce feedback.
My motor needed a touch of oil to reduce noise.
I’ve got it running at a speed that I’m just about happy with, this is a listening and comparison test - not a full calibration.
Can i say again, this is not intended to be a replacement for any modern deck - it’s an experiment. It took a long time for me to get to this point. I’ve designed and built many decks but never a 3D printed one. It works, it has a little rumble, minimal flutter and a stable arm. But it’s lightweight and sensitive so be careful where using and where it’s placed.
Feedback welcomed. And if you build one I’m happy to help :-)
I’d like to thank Rhino for their trial software. I used Rhino 5 for Mac which is a superb and versatile 3D modeler that allows beginners to get a feel for professional 3D design software, and allows experienced users to utilise their design ideas to the fullest. It’s a deep and very functional software that has an excellent support base with tutorials for everyone. Highly recommended.
Loading prints...
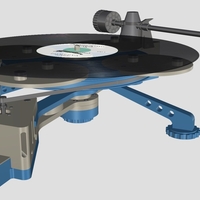
Vinyl Turntable - It Plays Records :-)
Creative Commons Attribution-NonCommercial-NoDerivatives
You can download and share as long as you credit the creator, but you cannot change the material or use it for commercial purposes.
 Licensed under CC BY-NC-ND


Loading comments...