


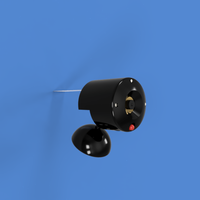

Here is a simple camera case for the Raspberry Pi version 2 camera. The extra gasket (gasket.stl) is to enable the fitment of a metal shim with a pinhole drilled into it. Anything larger than 0.60uM will work. Please remove the existing lens before attempting to use a pinhole. This does "destroy" the lens, however, careful removal using sharp wire cutters on the corners of each of the camera can result in the lens being removed intact. I know, I've done it numerous times.
I won't be held responsible for destroying your PiCam if you install a pinhole lens.
I have used these extensively for my PhD thesis works.
For assembly instructions, please see the below video. The whole assembly is held together with 3 M3 35mm socket head bolts. Such as those found at https://www.bolt.com.au/m3-35mm-socket-head-cap-screws-p-26429.html.
If you find that the ball joint is too loose, try increasing your printer tolerances or, optionally, insert a grub screw into the flat portion of the ball. Such a grub screw includes a cone point that can be found at https://www.bolt.com.au/m3-10mm-grub-screw-cone-point-p-28353.html. This can then be adjusted out until a firm grip is reached.
A slot in the base allows an 8mm button magnet to be placed firmly for securing to magnetic surfaces. These magnets can be obtained from Element 14: http://au.element14.com/duratool/d01766/magnets-rare-earth-8-x-3mm-pk10/dp/1888095
Finally, an optional 5mm LED can be installed in the lower hole of the camera to allow increased Infrared illumination for night vision applications or just for fun to show when the camera is active. I suggest using an LED from the Kingbright range such as
http://au.element14.com/kingbright/l-53p3c/phototransistor-5mm-940nm/dp/2290444 (InfraRed)
or
http://au.element14.com/kingbright/l-1503ec/led-5mm-red-50mcd-617nm/dp/2335729 (Std Red)
Print Settings
Printer:
ZYYX+
Rafts:
No
Supports:
No
Resolution:
0.16
Infill:
0.25
Notes:
The camera is printed out of Aurarum PLA Plus.
Post-Printing
Temperature Treatment
Aurarum PLA plus can withstand temperatures of up to 100°C once it has been heat-treated. After printing, the parts of the camera are baked for 30 minutes in an oven that has been preheated to 80°C (176°F). This enables the camera case to withstand the temperatures of general environmental constraints of most dSLR cameras (0-50°C).
Assembly Instruction
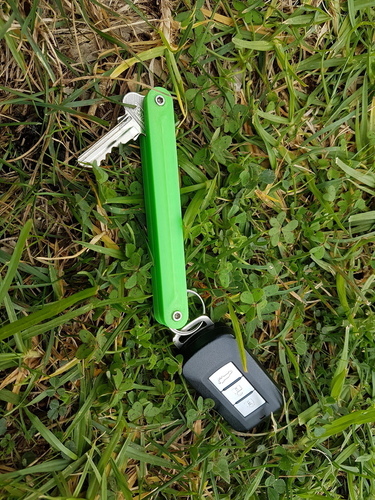
Pinhole Version 6 assembly animation. The green marker indicates the pinhole shim which is an optional extra when using this design.
Pinhole Version 6 assembly animation. The green marker indicates the pinhole shim which is an optional extra when using this design.
Loading prints...
Raspi Security Camera
Creative Commons Attribution-NonCommercial-ShareAlike
You can distribute, remix, adapt, and build upon the material in any medium or format for noncommercial purposes only, with attribution and under the same license.
 Licensed under CC BY-NC-SA
Files Included
8 downloadable files:


Loading comments...