
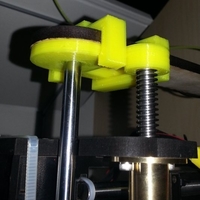


Summary screwless fixing of z axis. reduce z wooble.
Instructions installation instruction: remove screw on top left of your oneup. install part-three first then part-one, then reattach the removed screw again and as last one part-two. see animated gif ;-) after printing the parts i had to clean the edges with a knife and used a drilling machine with 8mm an 10mm for enlarging the holes. --> needs a further optimizing of the 3d model.
Loading prints...
qu-bd oneup fixing for z axis
1
like
0
collections
Tags:
Creative Commons Attribution-ShareAlike
You can distribute, remix, adapt, and build upon the material in any medium or format, as long as attribution is given and your contributions are under the same license.
 Licensed under CC BY-SA


Loading comments...