


Z Axis Synchronizer for the Hesine 505
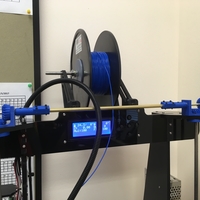
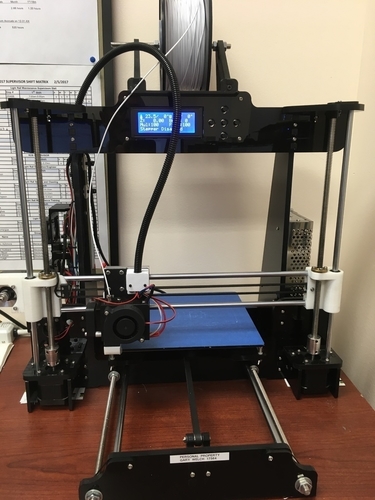
My Printer (Hesine 505) has a Z stop only on the left side, which makes the right side get lost sometimes especially during power up. I have to re-level before I can print which is a PIA. I designed this double miter gear arrangement to keep both Z axis in sync at all times. I did not want to use a continuous long GT2 timing belt as the slop factor is too great. The Miter Gears are a 20 deg. Angle type Miter gear that is slop free and smooth running. The whole assembly is easy to adjust once installed. I have provided 2 drill templates that will allow the alignment of the 8 holes for the 2-56 Socket Head Cap screws. The gears and all the parts are easily printed with no overhangs. I used PLA with 4 top and Bottom layers and 4 perimeters @ 100u per layer. Now when I print the extruder is always at the proper height and parallel to the build surface ( I do not use a bed leveling routine in my firmware). The Gears are secured to their shafts using 4-40 set screws. The shafts are K&S Brass tube 3/16” OD for the Left Gear and ¼” OD for the cross or connecting shaft. The 3/16” Brass tube will need to be sanded slightly ~.002” to fit inside the 3/16” ID X ½” OD by .200” Wide Ball Bearings (I used standard Router pilot bearings here) The Z Lead screws had to raised to mount the Right hand miter gear and is supported by 2- 8 X 12 X 3.5mm Stainless Steel Shielded Ball Bearings from McMaster Carr PN# 7804K115 $8.03 / ea. The Z Lead screw support bearings are housed in the “Lower 8mm Bearing Holder.STL” These are tapped 2-56 and are secured to the bottom of the top acrylic plates that are sandwiched between the lower bearing holder and the “Top Bearing Frame.STL” using 4 2-56 X ¾ Socket Head Cap Screws for each tower. The long couplings (5mm X 8MM) are used to raise the Z Lead Screws These are secured with 6-32 set screws. Use the collars to secure the 3/16” shaft from sliding laterally and to hold the gear in mesh. The split couplings are 2 piece with caps to hold the ¼” Brass connecting shaft in place. Use 2-56 X ¼” SHCS here. This arrangement works so smoothly and is totally slop free. Note: when tapping PLA 4 perimeters are required and tapping should always be done by hand and very slowly to avoid heat build up. I have also included the "X Axis End Plate.stl" This plate will support the right hand Z slide from being pulled inwards towards the left side due to X Belt tension. This pulling bows the Z Vertical rods inward and limits the tension you can have on the X Belt. Print with PLA and tap the 2 holes 6-32. use 2 6-32X 3/4" screws with jam nuts to apply pressure to the X rods. The plate is simply CA glued into the side of the right hand Z slide. as shown in the photo.
Loading prints...
Z Axis Synchronizer For Hesine 505
Creative Commons Public Domain
The creator has waived all rights to the work. You can copy, modify, distribute and perform the work, even for commercial purposes, without asking permission.
 Licensed under CC0


Loading comments...